The "AI Film Trailer" Era
You've seen a lot of these:
For the past year, it been relatively easy to make montages, "clip shows", and trailers like this. While they serve as fun proof-of-concepts and visual eyecandy, you'd be hard pressed to get a "good story" out of this video style.
Good stories have characters that occupy real spaces. They have room to live, breathe, and interact.
You don't just fast track everyone through a journey from point A to B and have that be the end of things (unless you're Game of Thrones). Characters need to spend time in places, to explore interpersonal relationships, to overcome challenges. They need places to think, talk, fight and argue, process emotions, grow, and sometimes do absolutely nothing at all.
Stories need locations. They're a first class citizen in storytelling.
Location and Blocking
We're all filmmakers at ArtCraft. The old school, photons-on-glass kind.
One of the biggest problems we've had over the past few years with AI video is giving our characters room to occupy. Setting them up on set, precisely controlling what's on screen, and maintaining consistency with their location. The majority of AI video right now looks like a series of disconnected clips, which results in AI film having that "film trailer" montage feel to it. Lots of jumping around, very little continuity.
We've figured out how to overcome this problem. And in the spirit of "Show, Don't Tell", let me show you what we've discovered. You'll intuit how this technique works immediately:
Now let me break down the rationale and the technique...
Moving the Camera is Important
In "film language", the camera's relationship to the characters conveys meaning. Sometimes we want to give the viewer a warm and friendly perspective, or perhaps frame the relationship between two different characters and imply a certain power dynamic.
Sometimes it's just important to show the location so the viewer can settle in. So the setting feels lived in and the viewer is immersed in it alongside our characters.
Text is a Coarse-Grained Representation
Here's a simple Nano Banana Pro prompt:
Sam Altman in a room. He sits at a desk, looking towards a desktop computer on the left. The room is dimly lit. The glow of a computer terminal, sitting in front of him bathes the room in blue light. Behind him, there is a wall with a poster. There’s an AC/DC poster on the left, and a window on the right. Through the window, there’s a view of moonlit trees.
And the results:
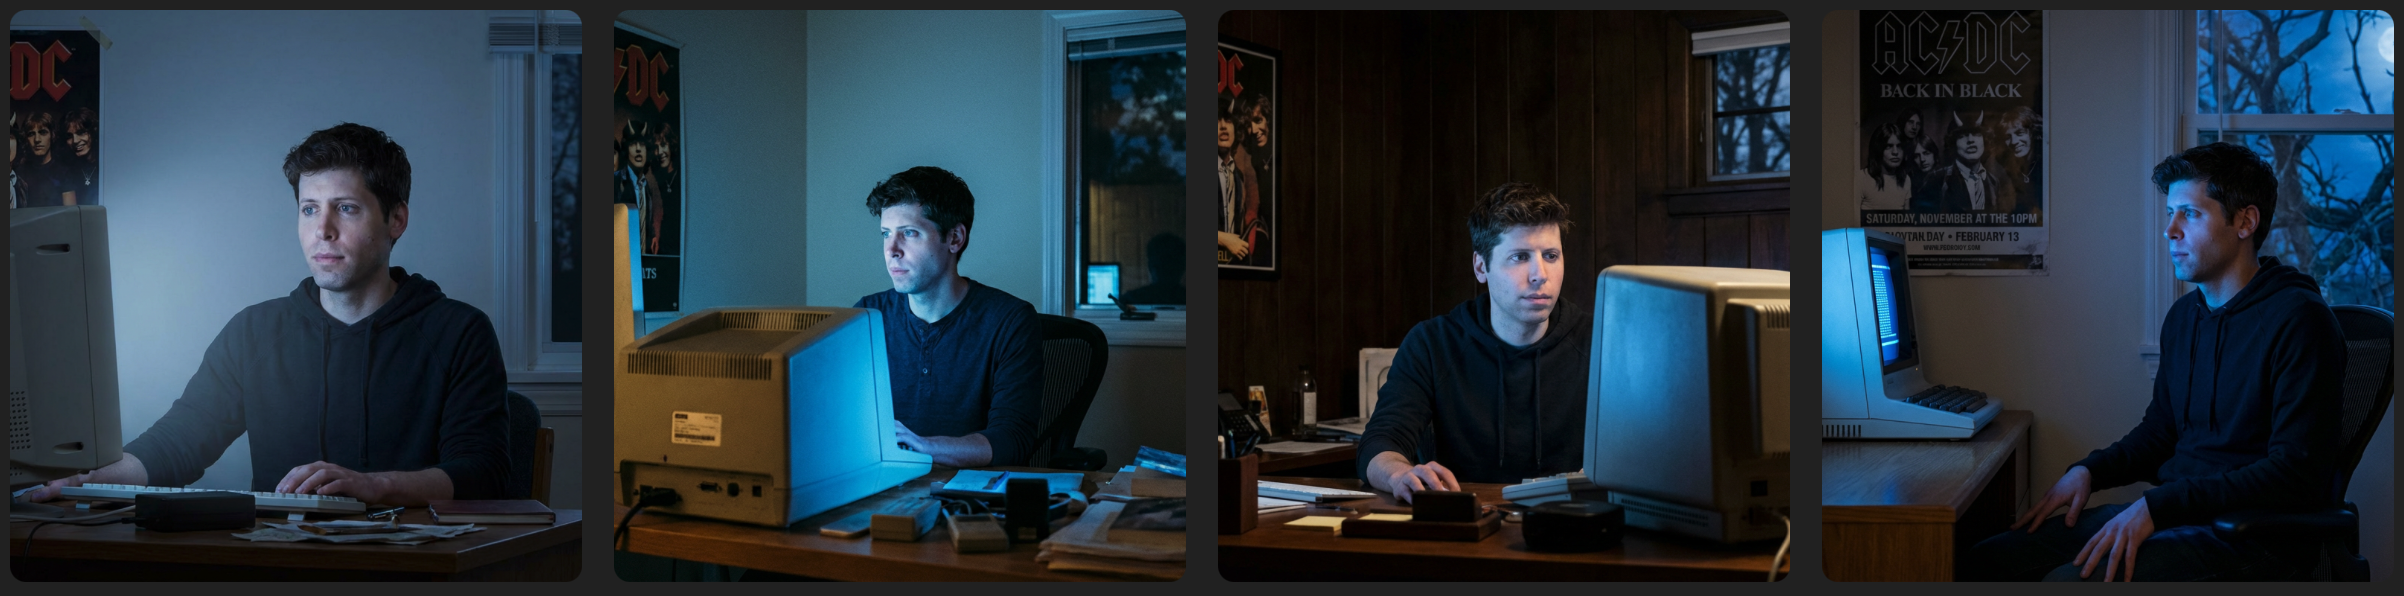
What happened to the location here? Why are none of these the same? Why are the locations of the poster, computer, window, and so forth so imprecise?
Moreover, how do we adjust this? Iteratively prompting?
You already know the answer: text is a poor serialization of the physical world. Text-to-Image is coarse grained. It lacks the ability to precisely convey physical attributes and spatial relationships. You can try, but you'll only get so much precision, and it'll never match the vision in your head.
Images are Incomplete
There are multiple ways to move a camera in an image-to-image workflow. You can use a ControlNet, a LoRA, or even ask an instructive model nicely:
Rotate the camera behind Sam Altman to show him from behind. Show the desk, computer screen, and wall behind the desk. Show the door to the room.
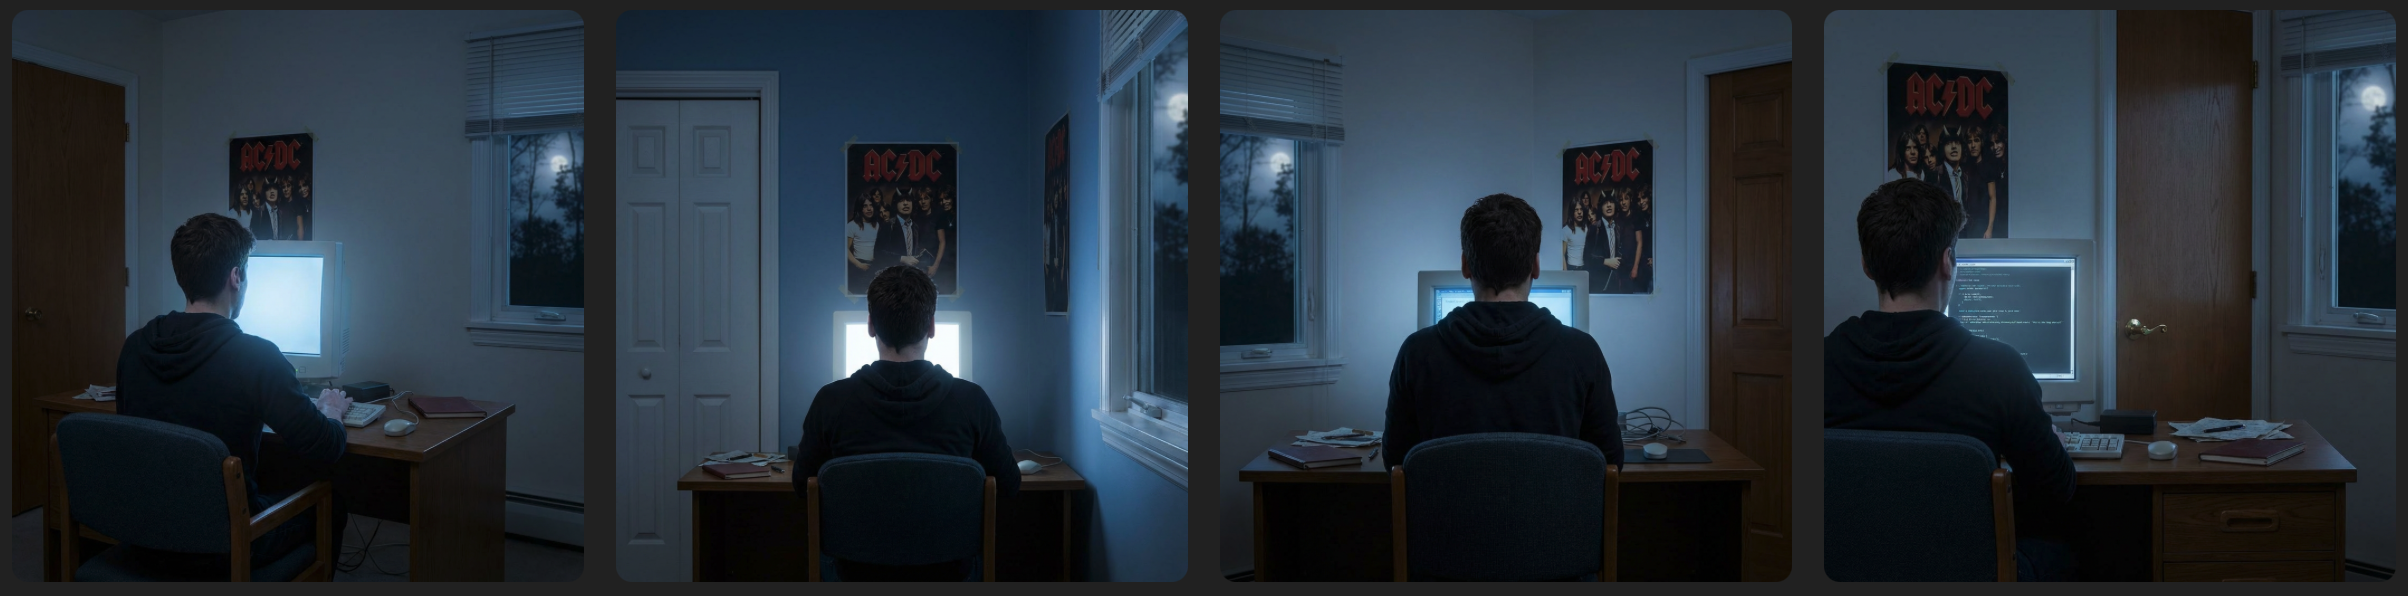
While the lighting and scene elements remain somewhat consistent, we're still ultimately left with the same issues we had with text-to-image. We can iterate on editing with words, but it's slow, tedious, and still imprecise.
(Why does the desk block the door? What is it even trying to do with that poster?)
3D to the Rescue!
One of the best tools for consistency is 3D. You can position your characters and props in a "3D set" exactly as you want them, and then move the "camera" to any angle, maintaining strong consistency throughout.
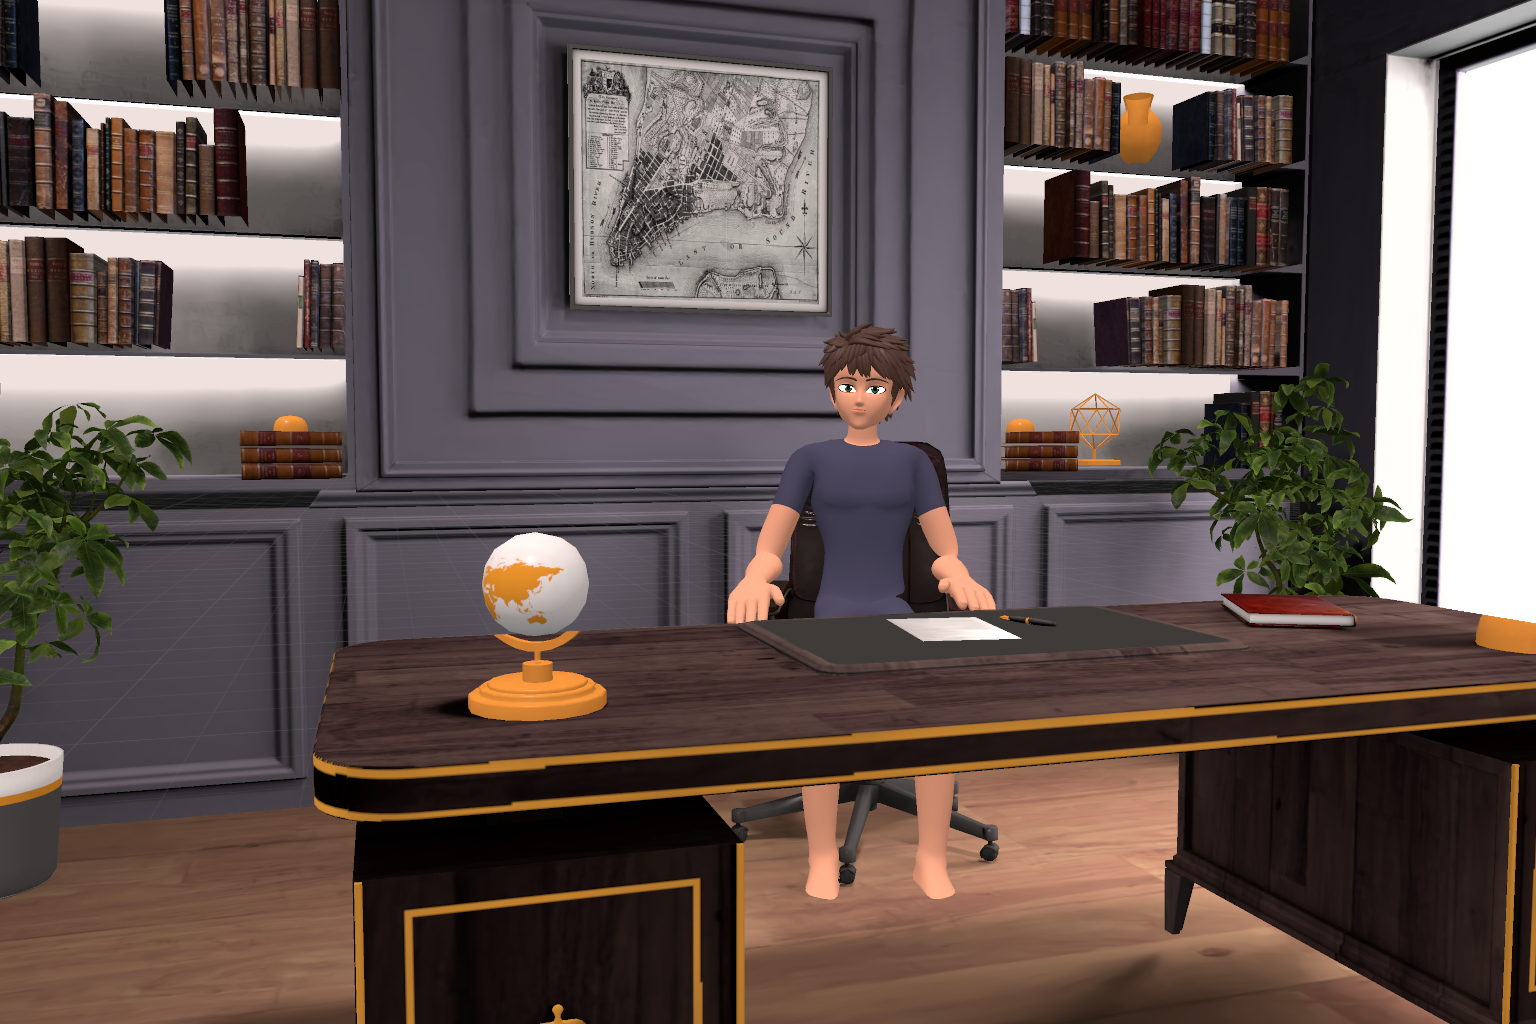
Pick a "smart" model like GPT Image 1.5 or Nano Banana Pro to convert this previz into a photorealistic render (or any style - anime, sci-fi, whatever):
Suspense movie - live action - night time. Make a photorealistic picture of Sam Altman sitting at a fancy office desk. Use the previz scene as the layout and posing of the shot. The camera and pose of Sam should match this shot. Nighttime shot, moonlit glow.
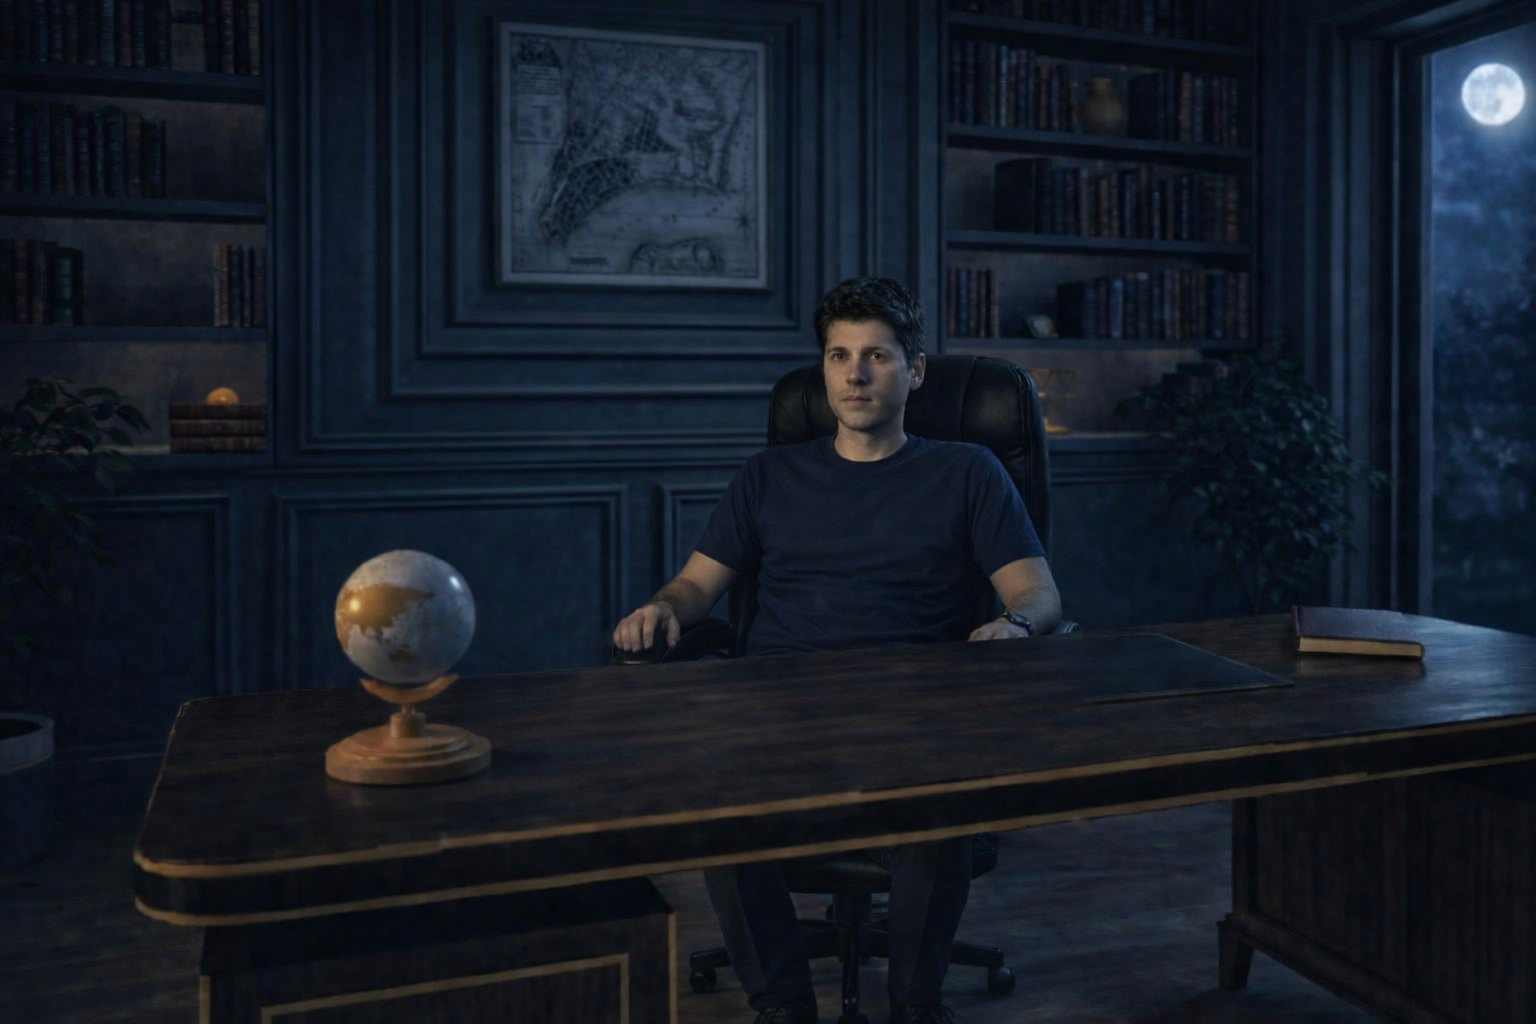
If desired, you can also attach additional reference images for character designs, wardrobe choices, etc.
After Nano Banana Pro lighting adjustments and upscaling (and showing it the previz again to restore the missing desk pad), we get this:
Make this look more photorealistic. Suspenseful night in the office
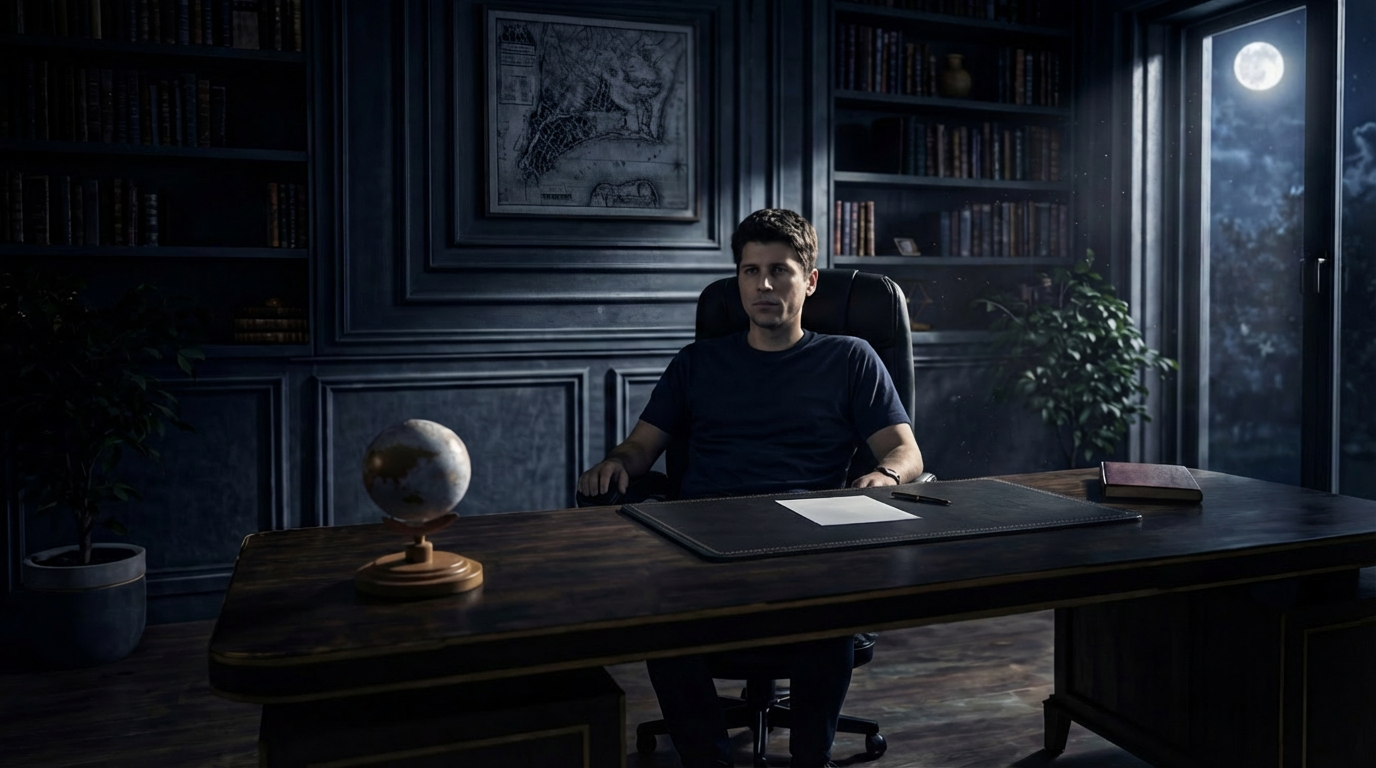
It's a great starting composition before calling "action" with a video model. (I'm no Roger Deakins. I would adjust the framing, but I wanted to show under the desk as well as bookcase features. I was also up late writing this.)
3D Kit Bashing
You can use 3D kits found online, many of which are free or low cost, to "kit bash" a scene. Synty, CGTrader, ... there are hundreds of sites for locations, objects, characters, and more. With these assets, you can provide exact blocking and layout you want - but more importantly, you can reuse them for additional shots and camera angles. Your characters need to be seen from multiple angles, and your props need to be consistent throughout the scene.
Action movie - live action - day. Turn this previz scene into a photorealistic desert island. Keep the tree, boxes, and treasure chest in place.
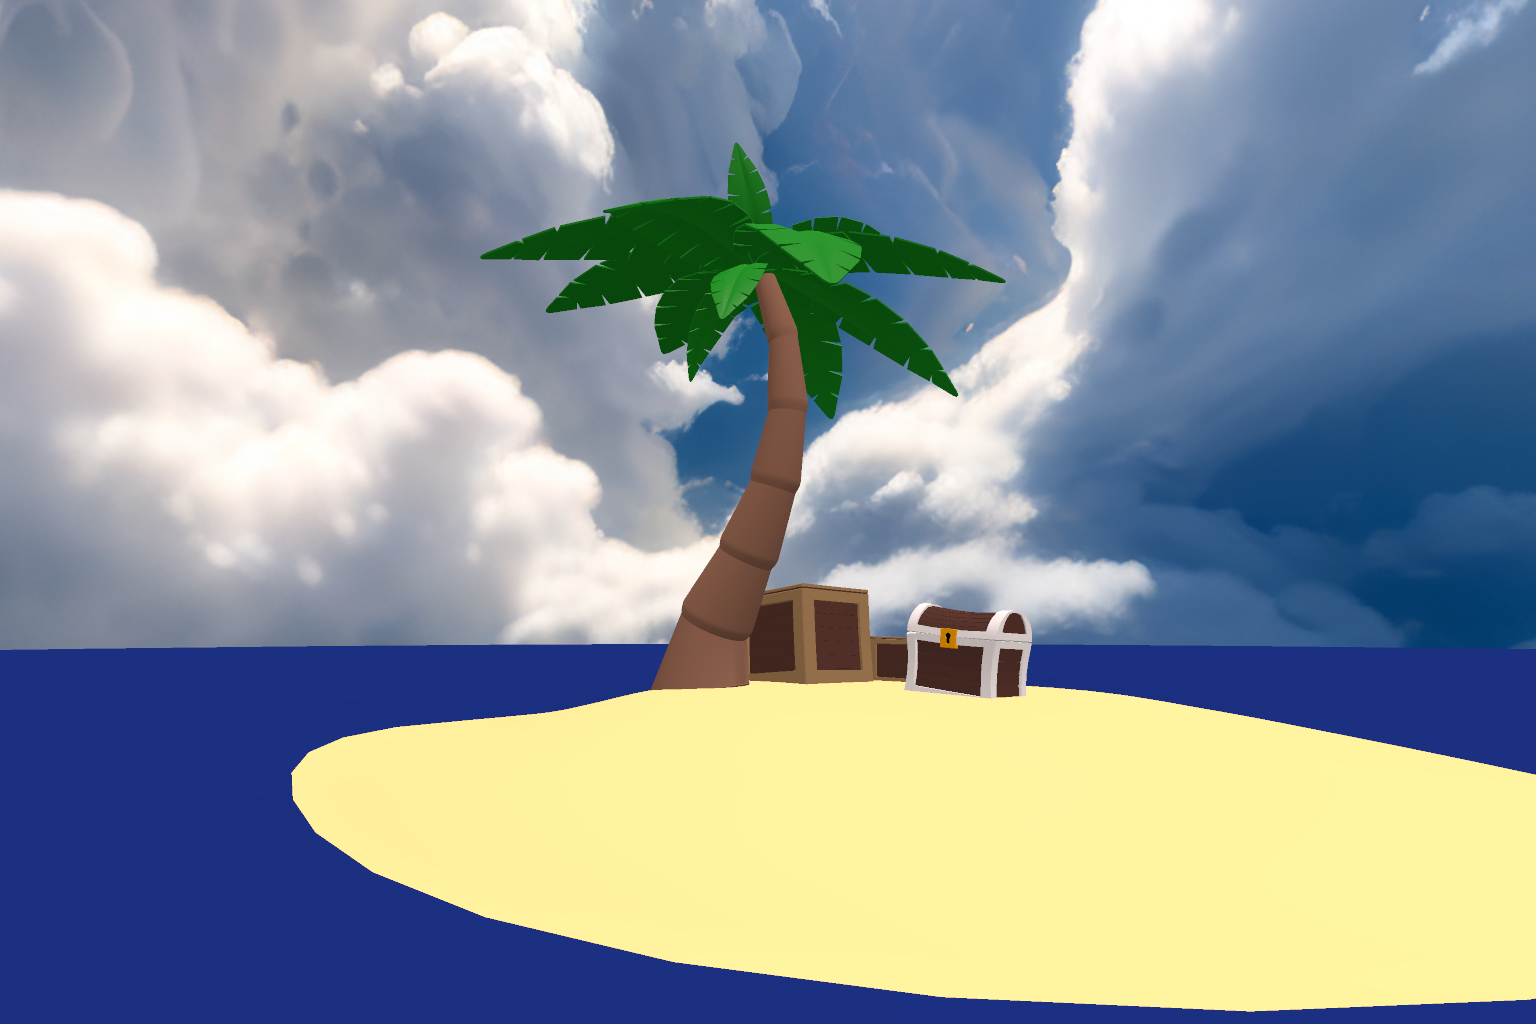
And the render, with one extra NBP 4K upscale (I did ask it to change the clouds on the second pass):
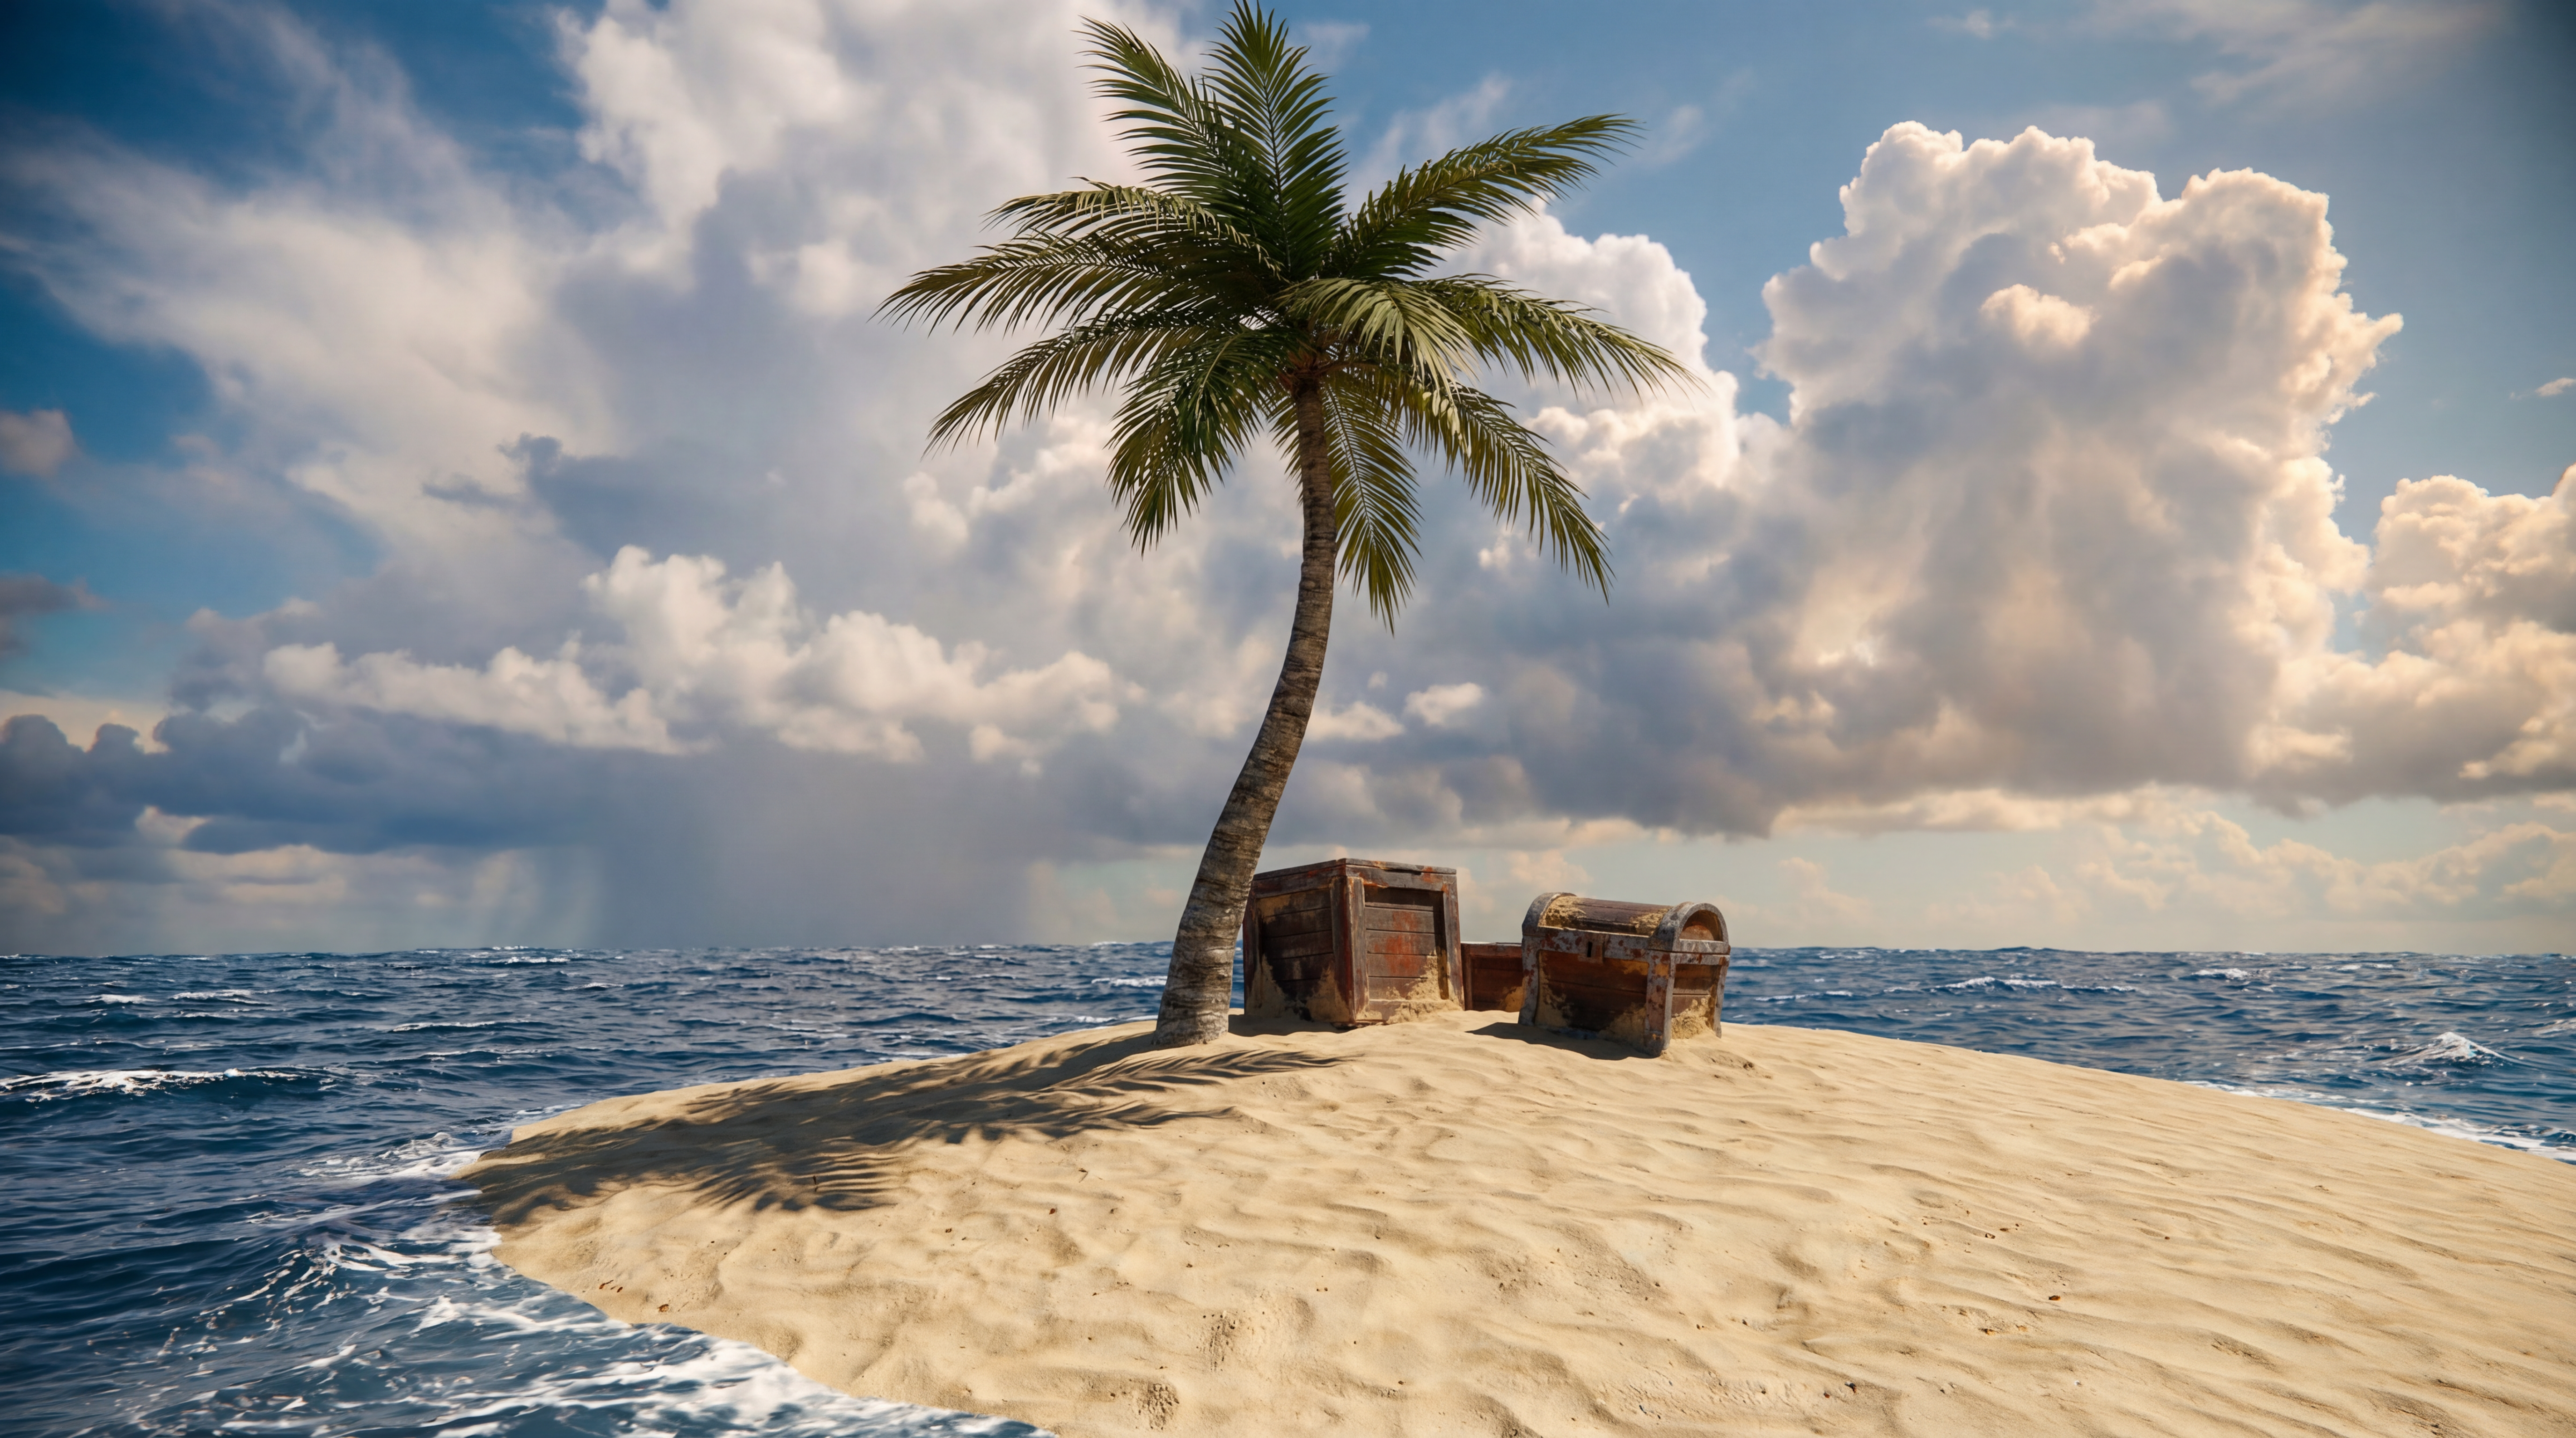
Image editing models are also surprisingly robust at changing the composition controllably if you give it enough structure to start with.
Greyboxing
But kit bashing can be slow. You have to find and curate a selection of assets. If you need to go faster, you can use 3D primitive shapes to "greybox" a scene:
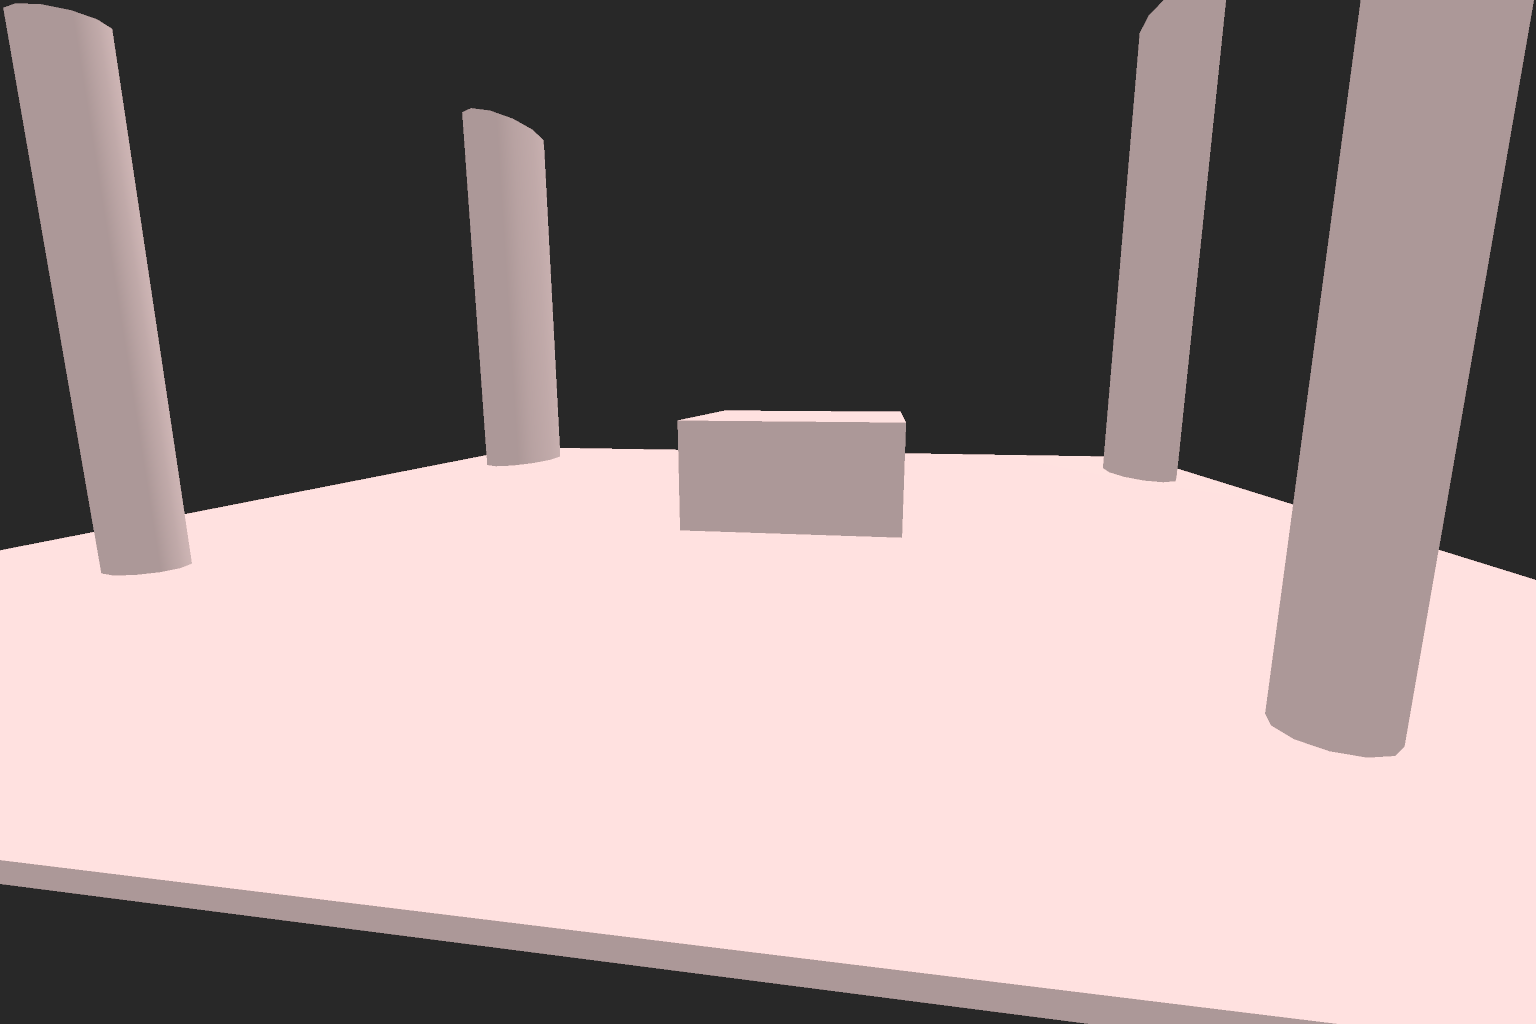
Historical epic - live action - sunset. Use this previz scene for the composition. An ancient greek temple with ruined concrete and marble columns. The pink and orange sunset bathes the concrete and marble. In the distance, there are rolling green hills and valleys. Bright pink sky.
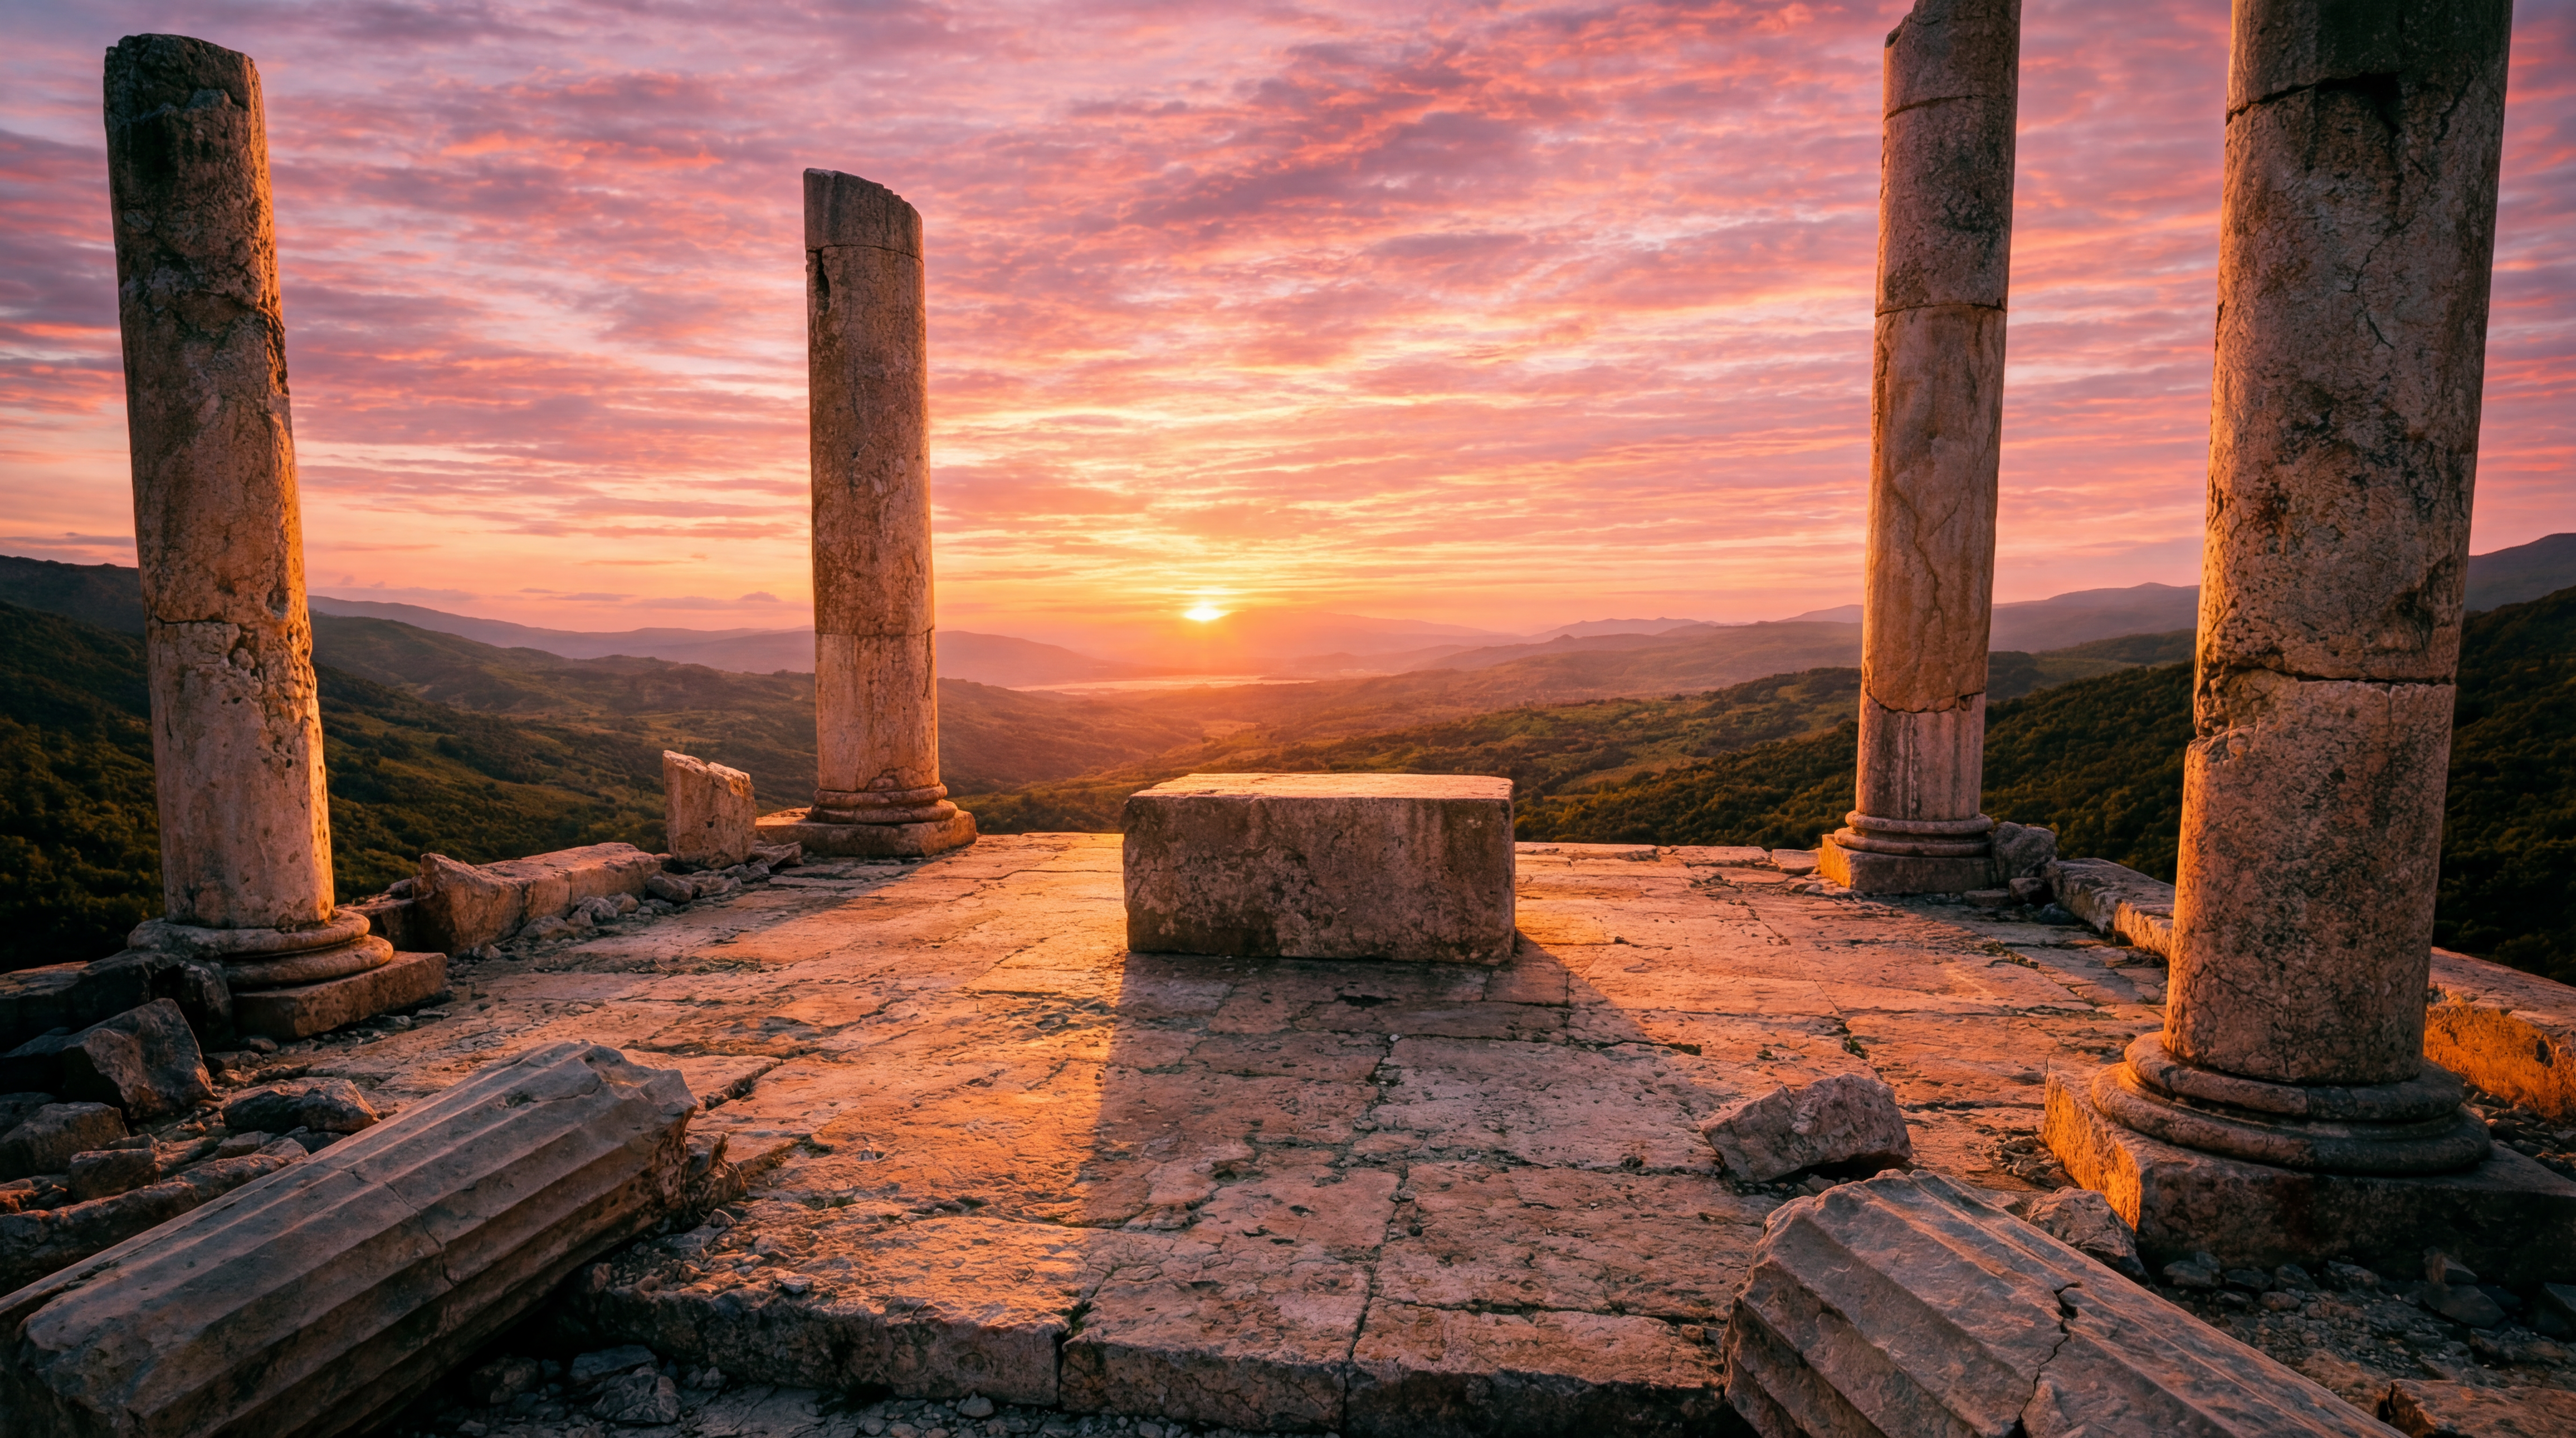
You can drop 3D assets in alongside the greybox to position existing props or characters. You can even greybox just a single element, like a TV.
Billboards and Matte Plates
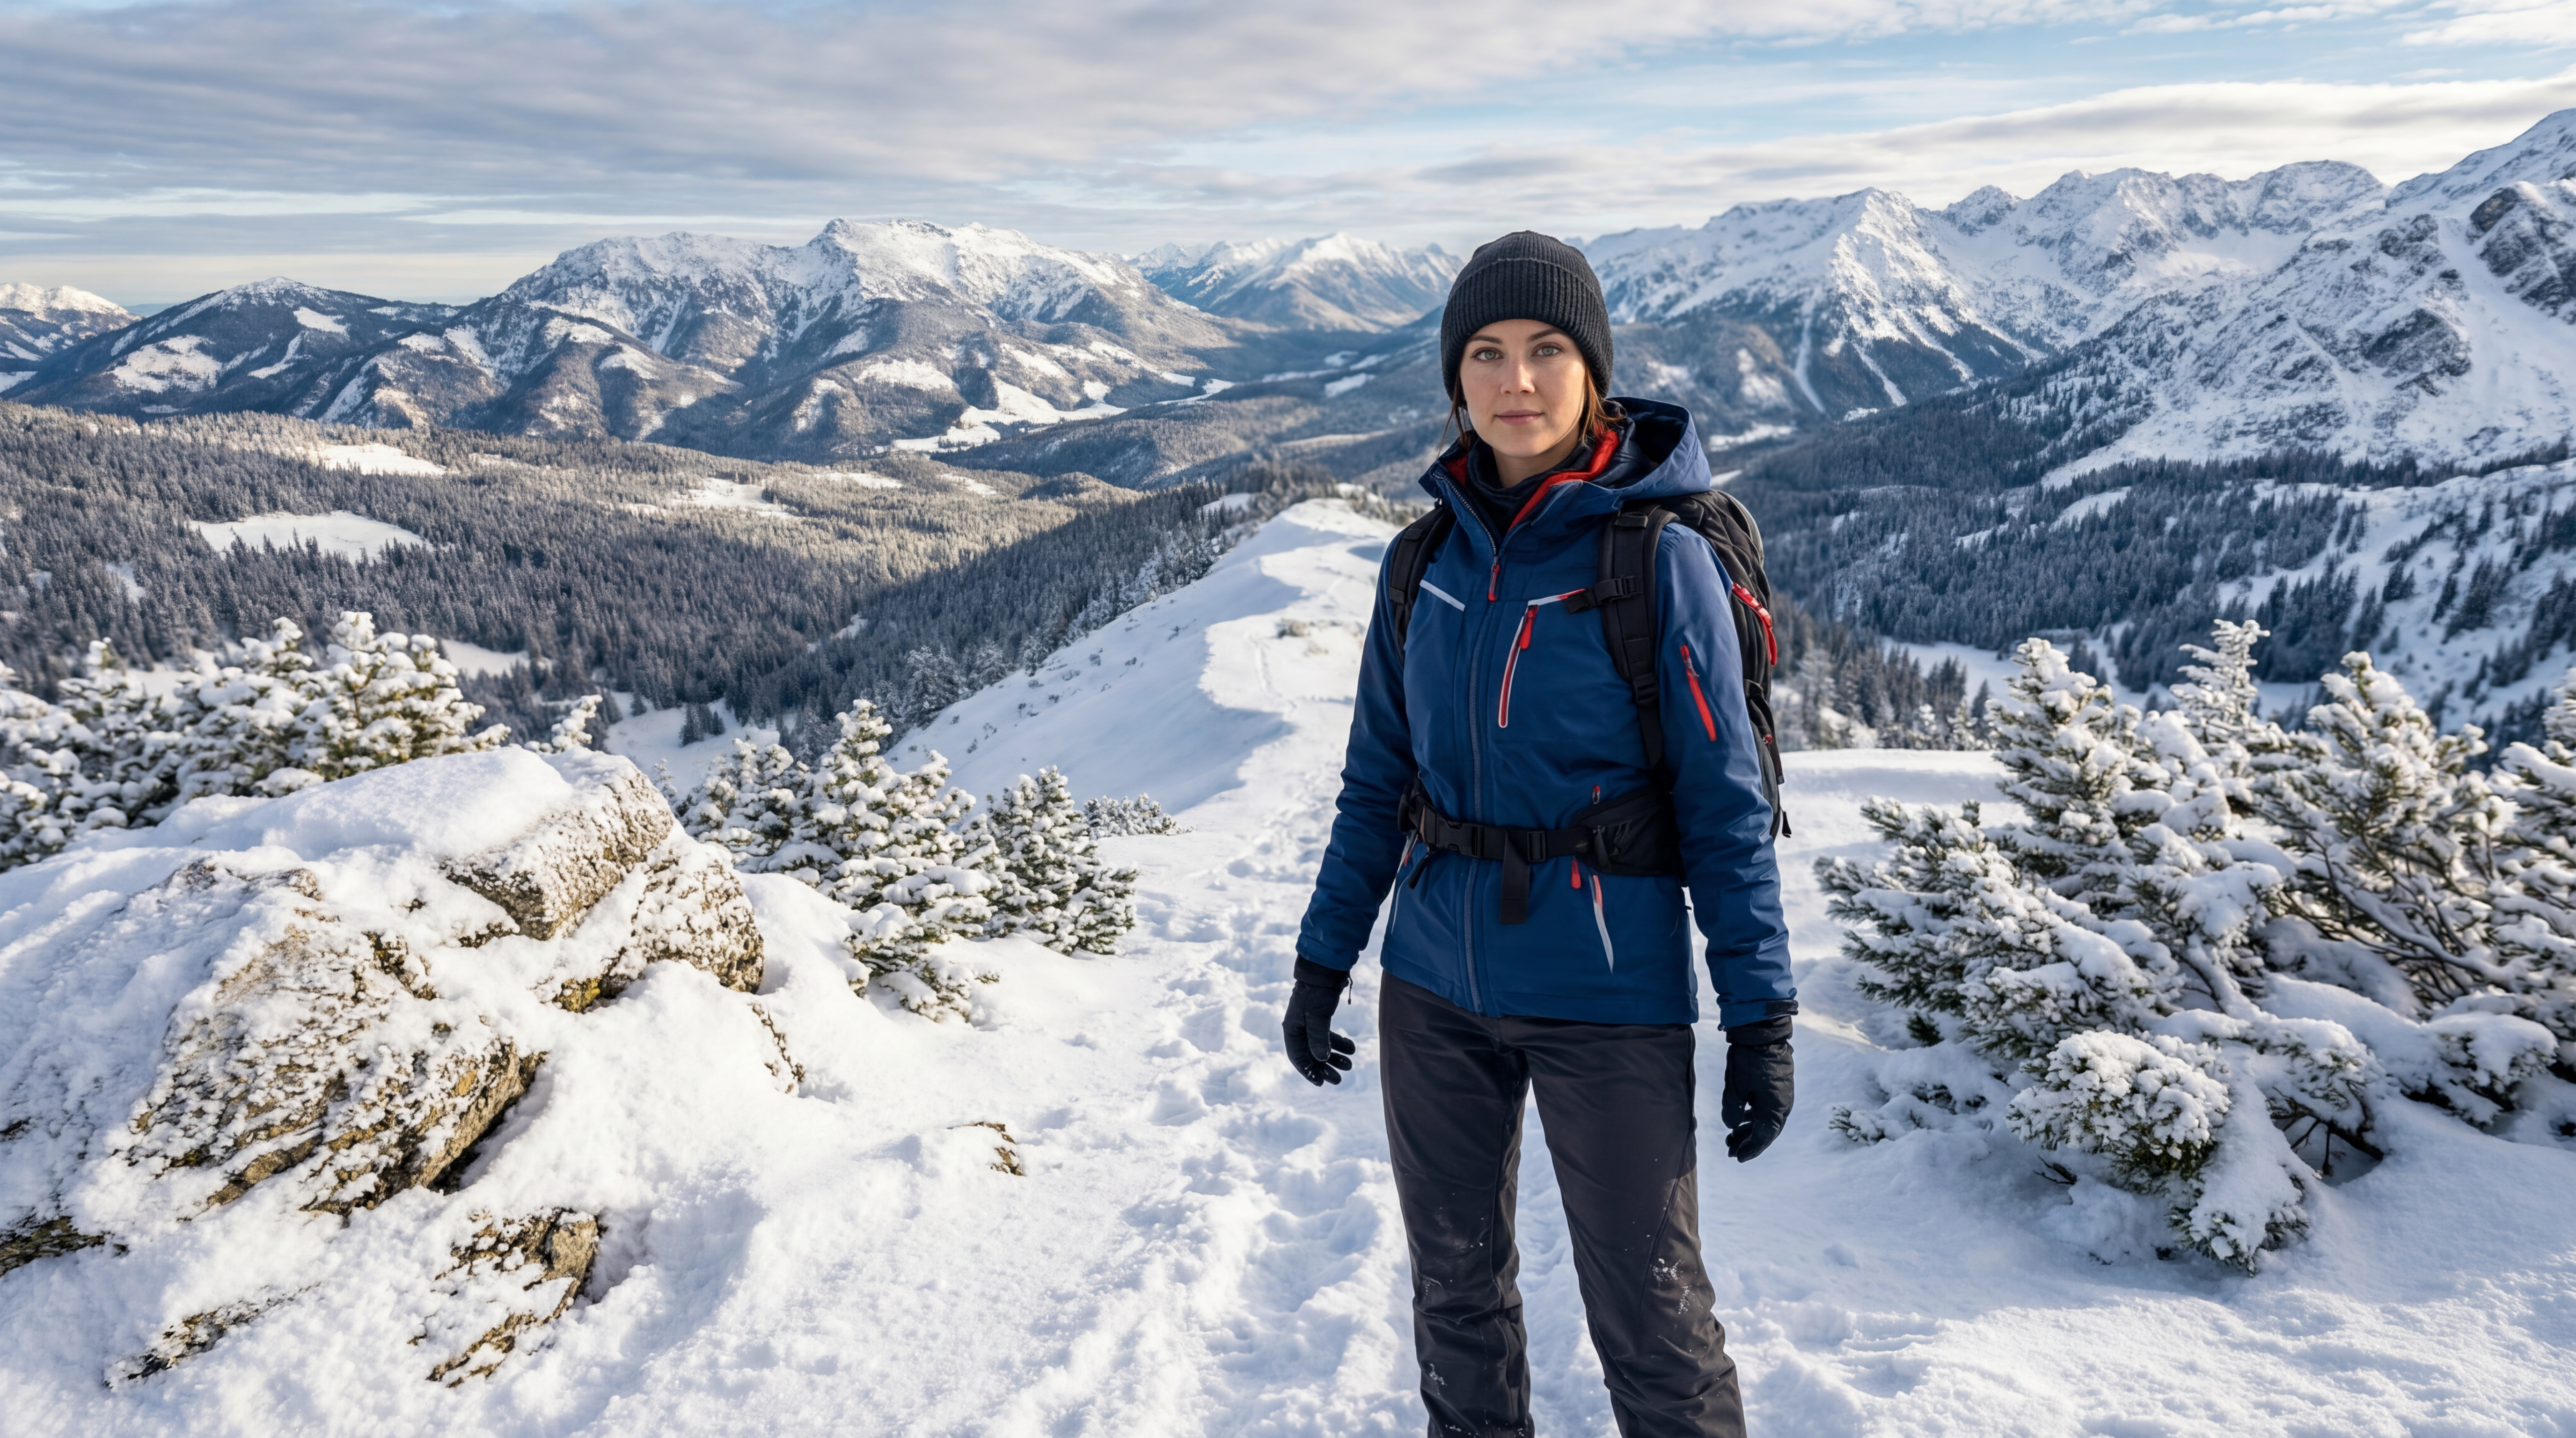
If you want to add a dramatic backdrop behind characters and a foreground, you can use the old Hollywood technique of creating a background plate (think the "matte paintings" used in Star Wars). In video game parlance, this is called using flat or billboard textures.
It's quick and easy, though you do lose your ability to rotate the camera. Use it for depth and backdrops:
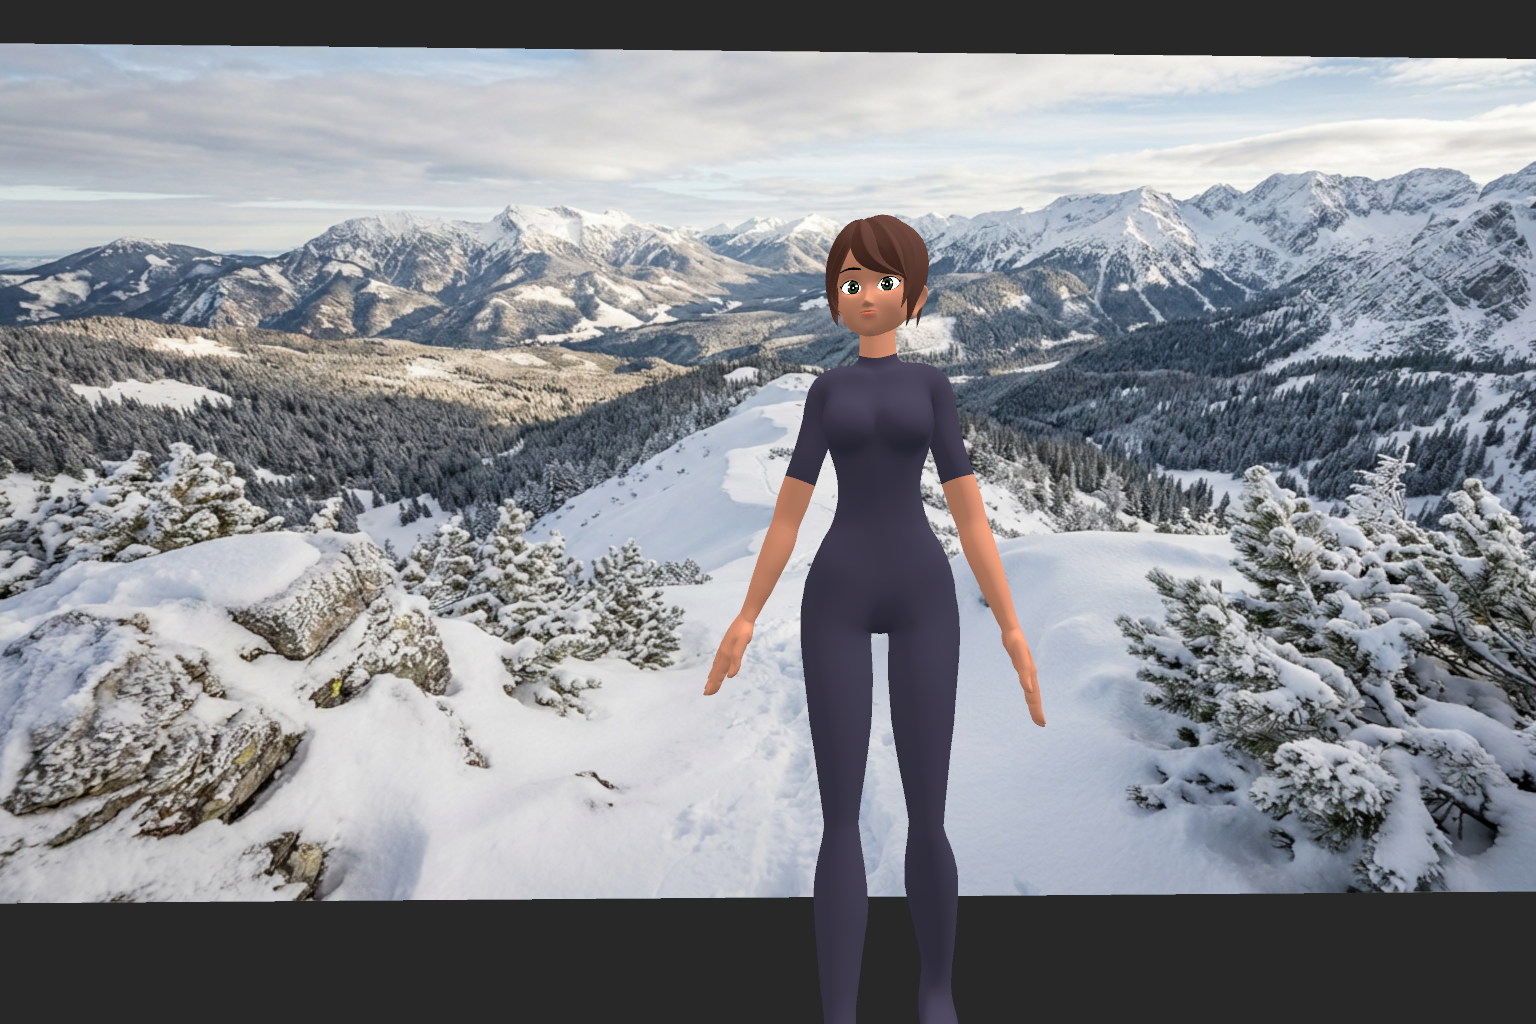
Sports footage - live action - day. Woman is hiking in the mountains. She is dressed in sporty warm winter wear. She’s standing at the peak, with a mountain forest behind her. Use this previz image to upscale the photo into a fully lifelike and photorealistic cinematic image.
Object Generation for Props
You can turn images into 3D prop objects using models such as Hunyuan 3D. This is useful if you need angles and precision posing for a complicated object, or if you intend to use the asset over and over and need consistency.
I generated a quick photo of an FJ Cruiser SUV:
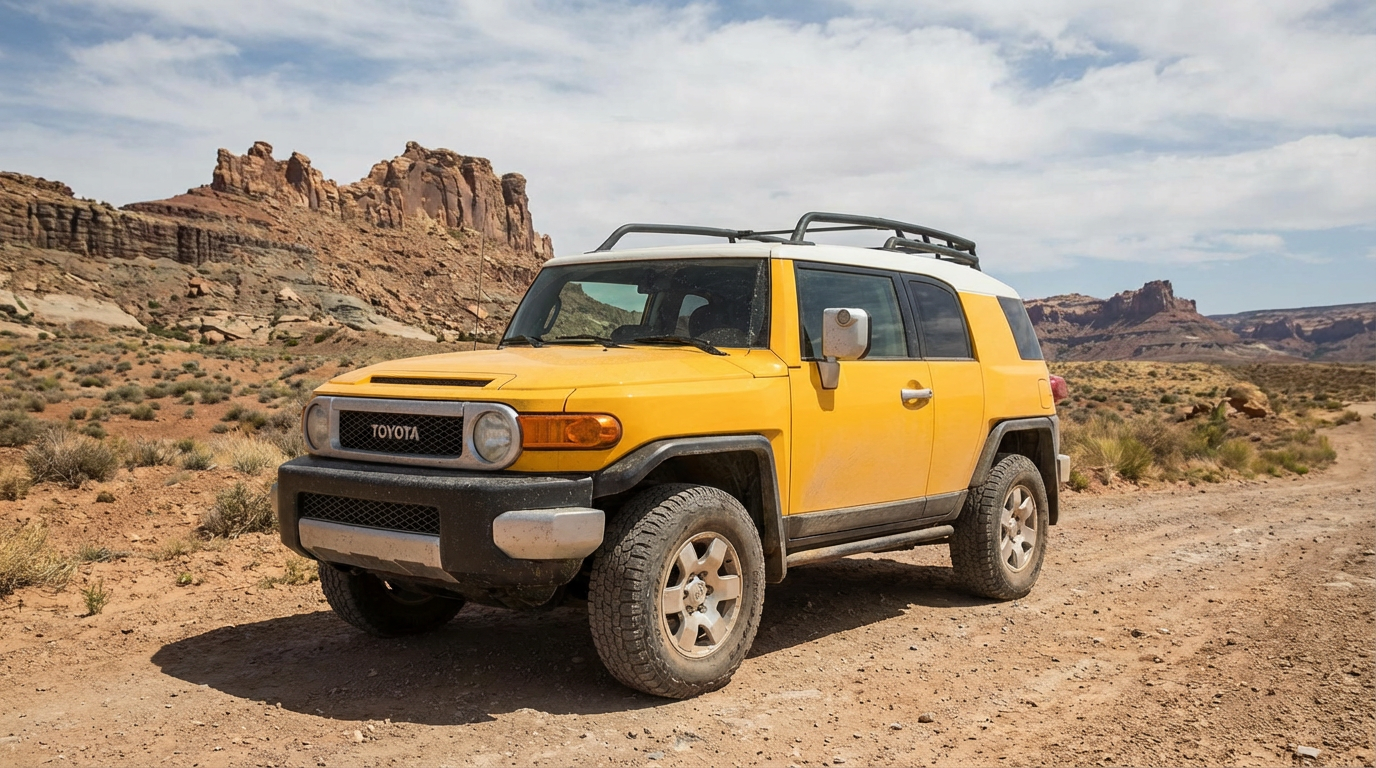
Turning this into a 3D object and instancing it around all over the place:
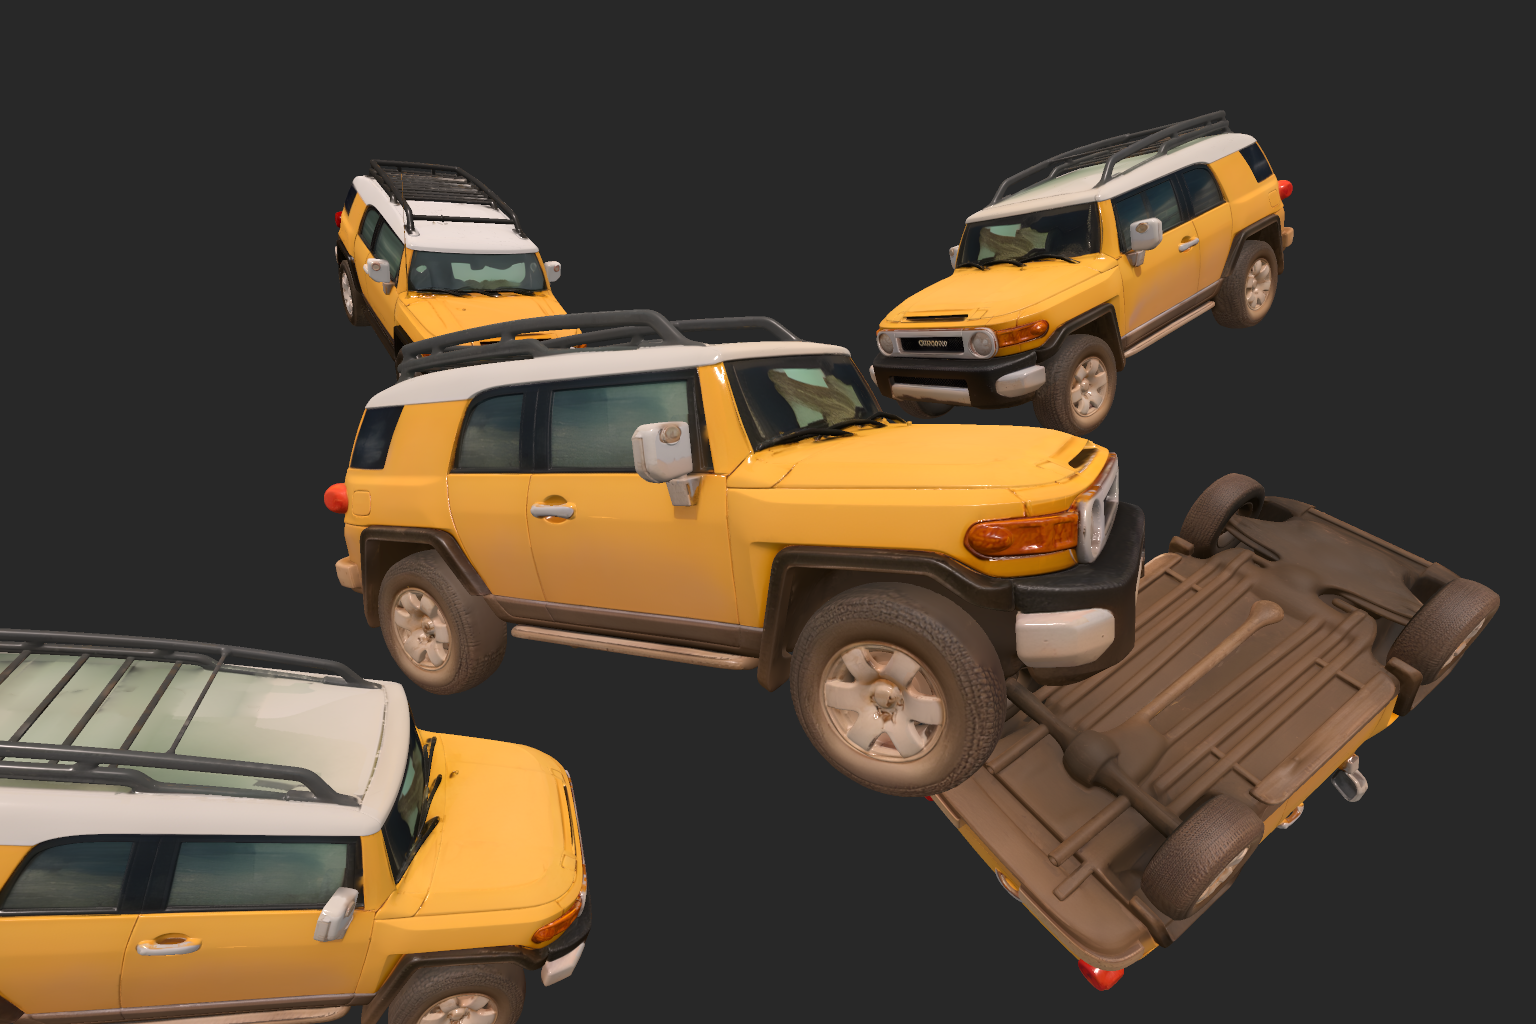
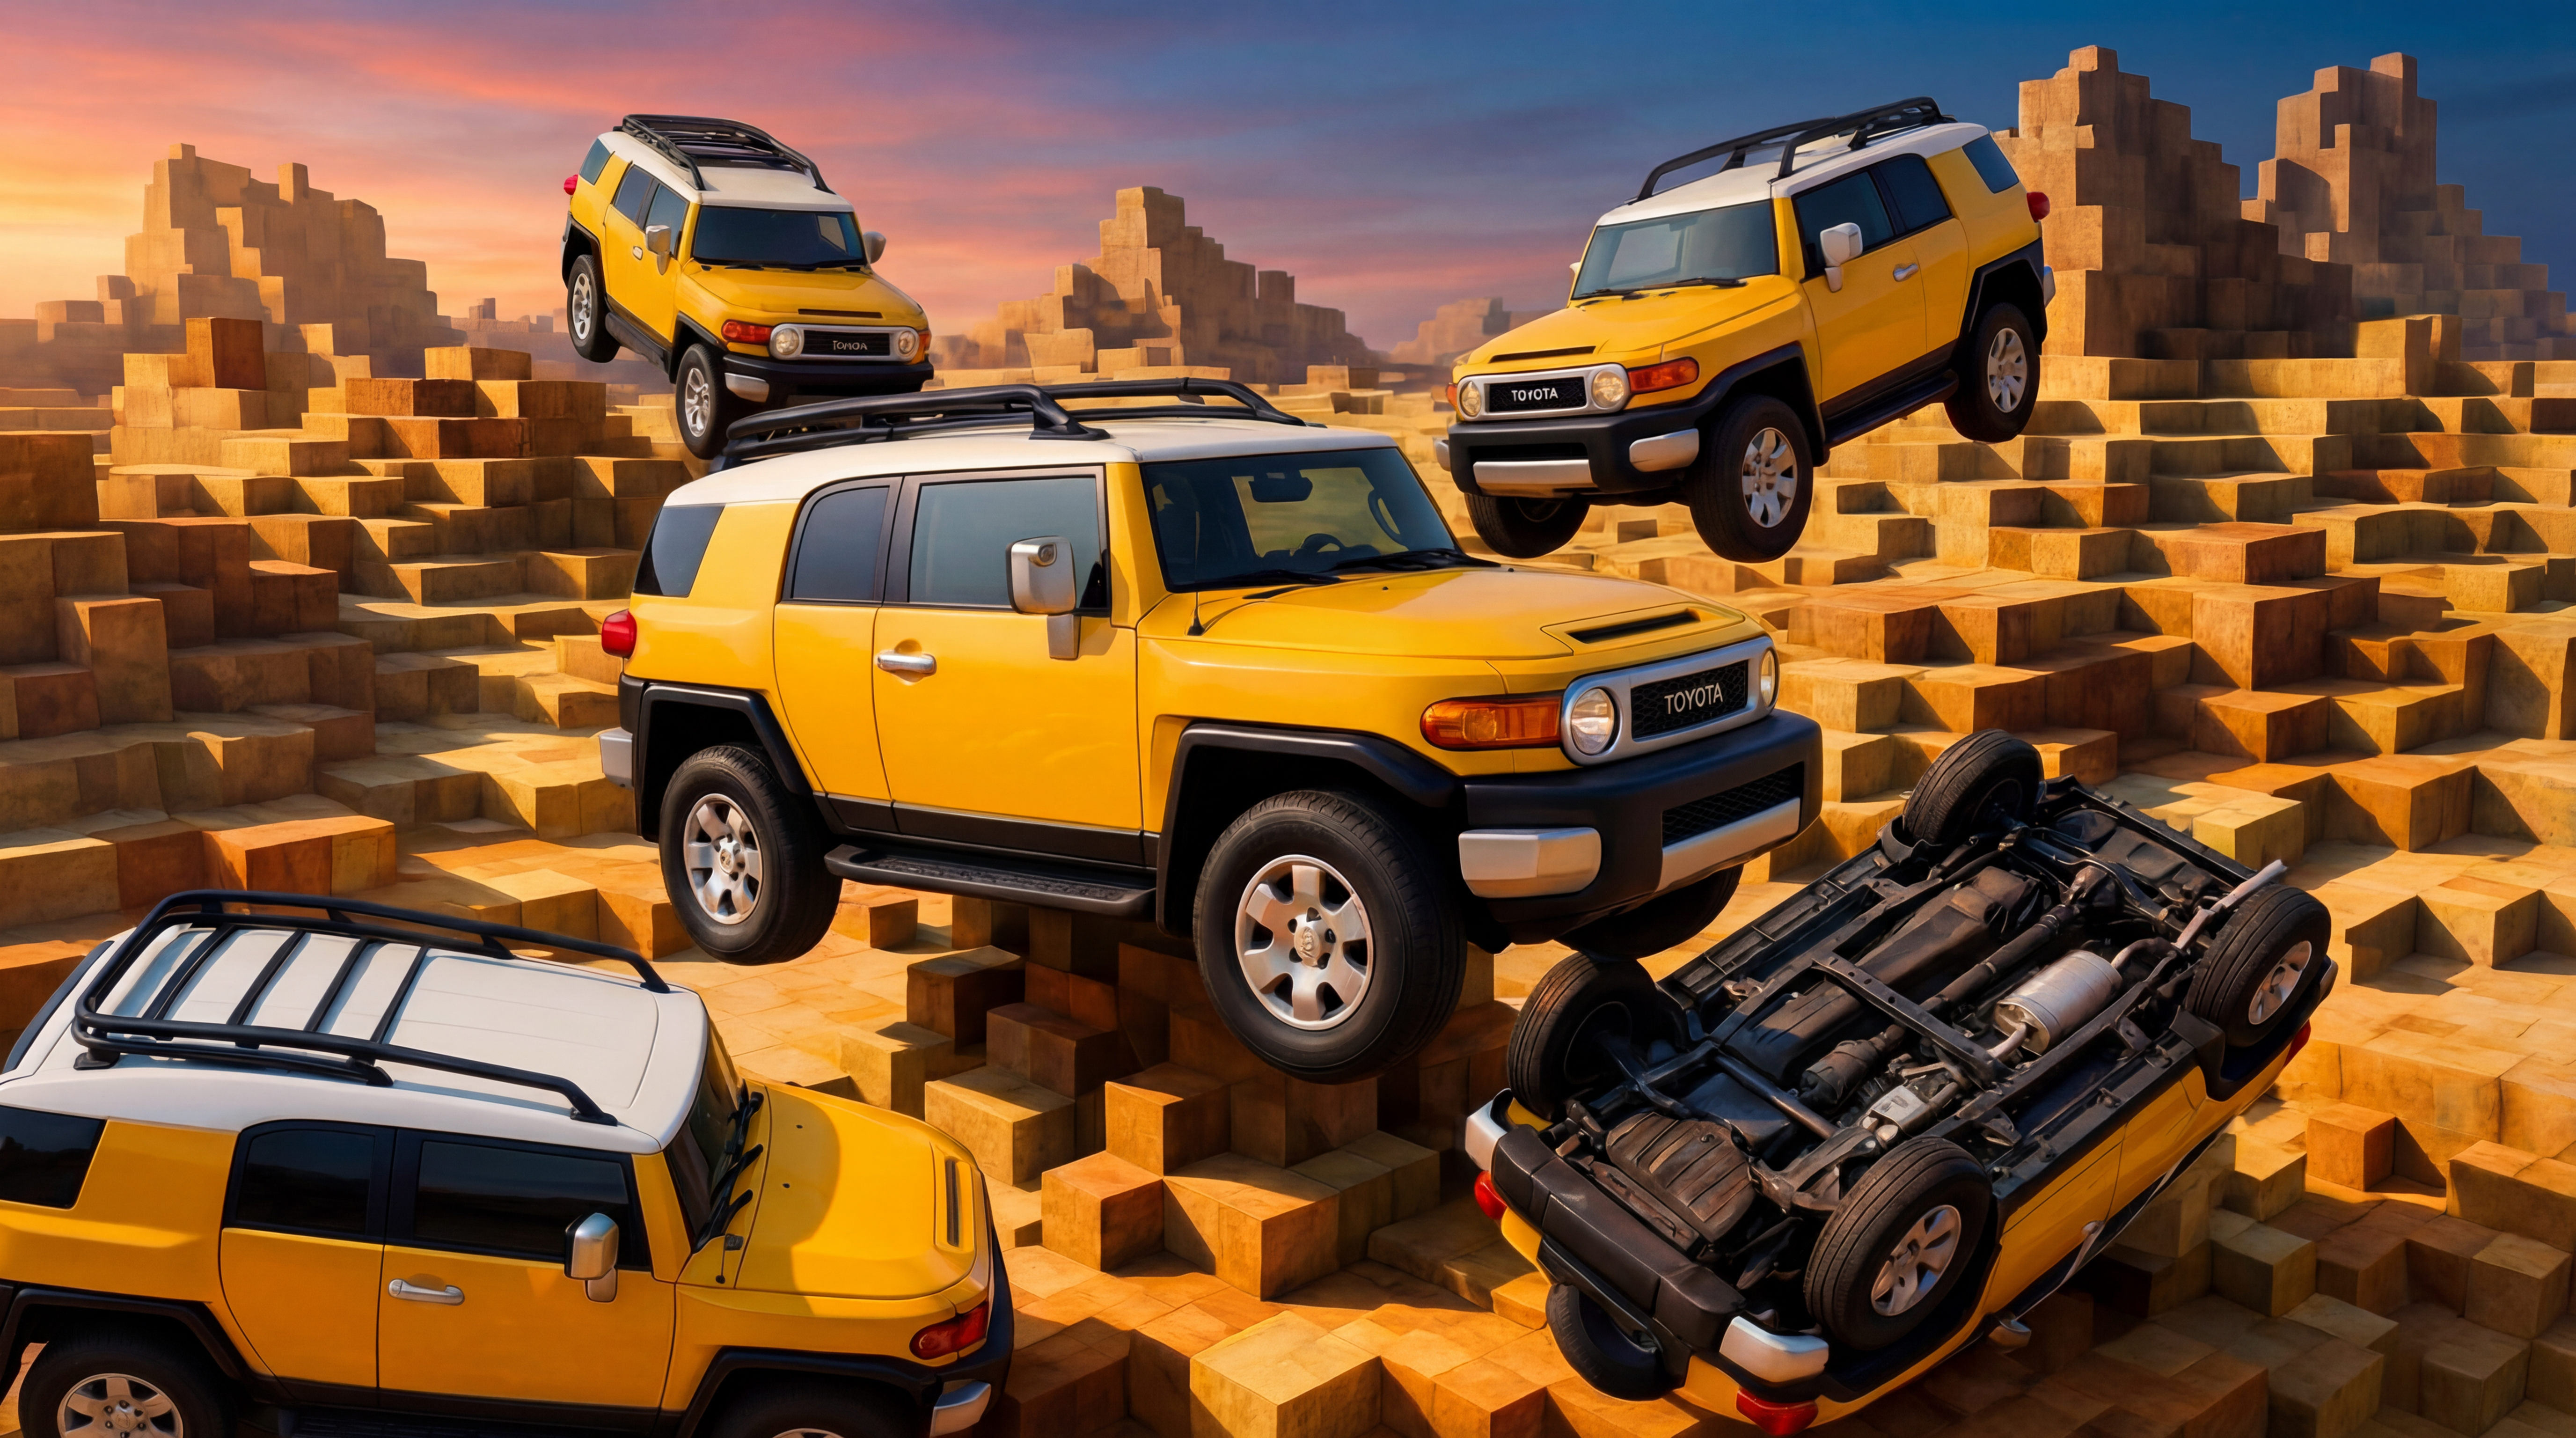
Then prompt, followed by a 4K upscale (with a few more fixes):
An artistic collage of fj cruiser SUVs floating in a pixelated desert. Match their pose and orientations exactly, including the ones that are flipped and rotated. Make the low poly fj cruisers look photorealistic and high resolution.
World Models Make This Easy
The real stars of the modern 3D compositing workflow are image-to-Gaussian Splat models, such as World Labs' Marble or Apple's Sharp.
You can very quickly create a pleasing image of an intracate set in MidJourney, edit it in Nano Banana, then turn it into a fully navigable 3D scene. This gives your characters room to move, your camera places to go, and your location opportunities to shine.
Finally, we have set pieces. And they're easy to build and iterate on.
Combining Techniques
You can use MidJourney to quickly generate brilliant scenes with high detail and magazine photoshoot quality layout, or you can draw a sketch or greybox a scene you'd like to build, iterate, then turn that into a world.
This is less like "prompting" and more like "crafting", with lots of different visual tools used in quick succession and coordination.
Need something? Generate it, turn it into 3D, edit, manipulate it. Stick it into something else. Rinse, cycle, repeat. Highly tangible, like an artist molding clay - except now we're moving closer to the speed of thoughts.
We're still being largely intentional. If there's something we want to see, we now have the tool to make it real. It's What You See Is What You Get.
We're painting with pictures. We're not prompters, but rather auteurs of crafting.
Machinima 2.0
Do you remember "Machinima"? It's a niche, indie genre of filmmaking that was popular in the early 2000's. Creators would pilot video game characters, carefully controlling for the camera, character movements, and on-screen details in order to tell stories. They would then dub over the footage to breathe life into the narrative.
Popular Machinima series include "Red vs. Blue", from Rooster Teeth Productions, which was filmed using the Halo video game series. Other notable Machinima include "The Strangerhood" (which used The Sims) and "Skibidi Toilet" (which leverages Source Filmmaker).
I mention this obscure artform because as a former Machinima creator myself, it feels like Image-to-Video is the new Machinima. There's the character posting, keyframing, and dubbing, of course, but there's also this notion of using pixels created by someone else's engine. And it's very much in the spirit of machinima to carve new creativity out of these engines by operating at a higher level.
Image-to-image, 3D, and World Models make an entirely new form of Machinima possible:
ArtCraft: Free and Open 3D Filmmaking
ArtCraft is a crafting engine and is available in its entirety on Github (please star us!), or try it today on Mac or Windows.
You generate images and videos in app using a wide selection of models and providers such as Midjourney, Google, Sora, Grok, WorldLabs, and more - or you can bring your own keys!
Over the coming weeks, we'll be adding FAL, Replicate, and Google Gemini. Local GPU support and RunPod support is also coming soon (subscribe to stay updated, or better yet, join our Discord).
If you're a blogger, podcaster, or creator we've got a ton of CC-BY-SA content here if you'd like to help us let people know about ArtCraft.
If you're a creative, please enjoy ArtCraft. We built it for ourselves and for you. Please join the community and let us know if there's any way we can help.
— Brandon Thomas